What Happened at the Battle of Hastings?
In the early morning of 14 October 1066, two great armies prepared to fight for the throne of England. On a hilltop 7 miles from Hastings were the forces of Harold, who had been crowned king nine months earlier. Facing them on the far side of the valley below were the troops of Duke William of Normandy, who believed he was the rightful king. By the end of the day, thousands lay dead on the battlefield, and the victorious William was one step nearer to seizing the throne.
Read on to find out what happened at the most famous battle in English history.
On The Eve of Battle
By the evening of 13 October, the English and Norman armies were encamped within sight of each other at the place now known simply as Battle. Duke William of Normandy had had plenty of time to prepare his forces since landing at Pevensey over two weeks earlier. An invader in hostile territory, William’s intention was to force a decisive battle with Harold.
Harold, by contrast, had just won a hard-fought battle at Stamford Bridge, near York, where he had defeated another claimant to the English throne, Harald Hardrada, King of Norway, on 25 September. When the news of William’s landing reached Harold, he rushed the nucleus of his battle-weary army back south, stopping only briefly in London to gather any extra forces he could.
Find out more about the Norman FleetHow Do We Know?
There are an unusually large number of near-contemporary sources giving us detailed information about the battle. But all accounts of it rely on two main sources: the Bayeux Tapestry and the chronicler William of Poitiers.
William of Poitiers, a Norman soldier, and later King William’s chaplain, compiled The Deeds of William, Duke of the Normans and King of England in about 1071. Although he didn’t fight at Battle, he clearly knew those who had.
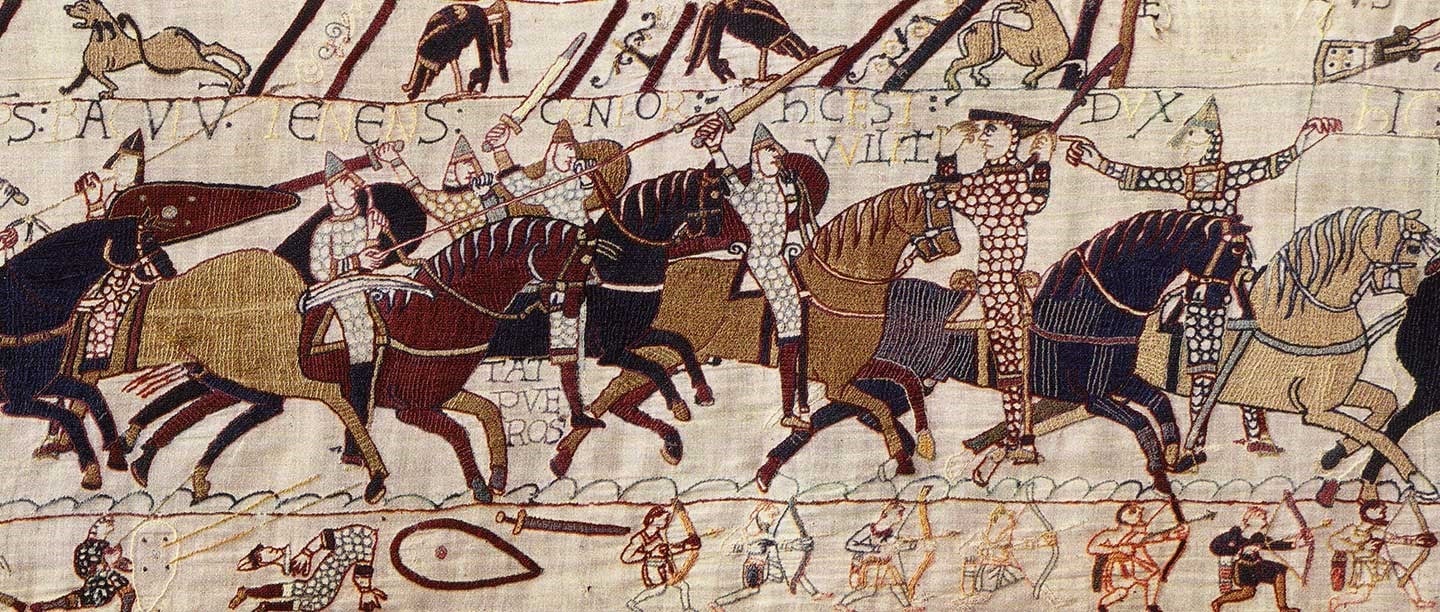
The battle is brought alive and given an immediacy unique among medieval conflicts by the Bayeux Tapestry. This tells the story of the events from 1064 to the end of the battle in a sequence of pictorial scenes. The tapestry was probably made soon after the conquest for William’s half-brother Bishop Odo of Bayeux, who features prominently in it.
Although both sources tell the story from the Norman viewpoint, justifying William’s claim to the English throne, they provide far more information than we have for any other medieval battle.
Taking Up Position
Soon after dawn on 14 October, Harold arranged his forces in a strong defensive position along the ridge now occupied by the buildings of Battle Abbey. The English line probably stretched for almost half a mile, and formed a ‘shield wall’ – literally a wall of shields held by soldiers standing close together – on the hilltop. This formation was considered almost impervious to cavalry, but left little room for manoeuvre.
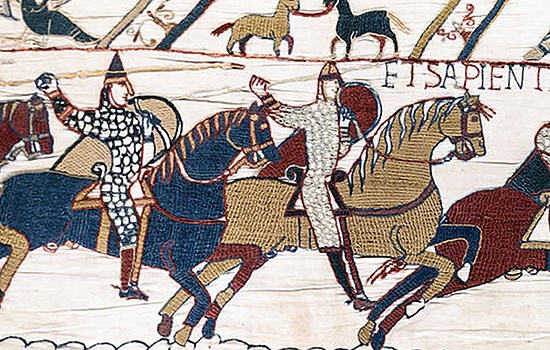
William ranged his army to the south, at first on the far hillside above the marshy valley bottom. His Norman troops were in the centre, probably with Bretons to the west and French to the east. These forces were in three ranks: the archers in front, then the infantry, and behind them the mounted knights.
Find out more about the Battlefield’s LocationThe Opposing Armies
There has been much debate about the size of the two armies. Some sources state that Harold had assembled a large army, but others say that he hadn’t yet gathered his full force. William’s army is said to have included not only Normans, but also men from Brittany, Aquitaine, France and Maine. The latest thinking is that both armies had between 5,000 and 7,000 men – large forces by the standards of the day.
As the Bayeux Tapestry shows, both had horses, helmets, mail armour, shields, swords and bows. The Normans used their crossbows with great success on the dense ranks of the English. In contrast, English archers were in short supply – perhaps a result of the speed of Harold’s advance to Sussex, as bowmen probably travelled on foot.
The main difference was the Norman use of cavalry. English armies used horses for getting around, but on the battlefield they fought on foot. The core of Harold’s army was his housecarls, perhaps the finest infantry in Europe, armed with their terrible two-handed battle-axes. In contrast, the backbone of William’s forces was his 2,000–3,000-strong cavalry force. At the Battle of Hastings, these different military cultures met head on.
Battle Commences
At about 9am the battle opened to ‘the terrible sound of trumpets on both sides’. Then, as now, the landscape must have been open enough to allow the two armies to manoeuvre. The slopes were probably scrubby grazing land, with the ridge occupied by the English army backed by forests.
To win, the English needed to stay behind their shield wall, allow the Normans to be decimated in repeated assaults, and then sweep forward to defeat the invaders. In contrast, the Normans had to climb the slope to be within bowshot of the English – a couple of hundred metres at most – then fracture the English line with archers and infantry so the cavalry could ride through and finish off the broken remnants.
As William of Poitiers recorded, ‘It was a strange kind of battle, one side attacking with all mobility, the other withstanding, as though rooted to the soil.’
Find out more about the weapons used at HastingsStalemate
Harold’s forces repulsed the first Norman attacks, the English battle-axes cleaving the Norman shields and armour. William’s forces regrouped, but then some of them on the left flank, hearing a rumour that the duke had been killed, fled in panic. Some of the English began to pursue them down the hill.
To stop panic spreading and rally his troops, William rode out in front of them, raising his helmet to show his face and shouting: ‘Look at me! I live, and with God’s help I shall conquer!’ In a successful counter-charge, his troops surrounded the pursuing English forces on a hillock and annihilated them. The immediate crisis had passed.
Trick Tactics
For the rest of the day, the Normans repeated their assaults on the English shield wall. At least twice they pretended to flee in mid-battle, to encourage the English to break ranks and pursue them. They were partly successful, but the English line still held.
We can only imagine the grim scene: the hillside slippery with blood and littered with bodies, arrows, and discarded and broken weapons; the tiredness, hunger and fear of the surviving combatants; and the commanders shouting to rally their exhausted forces. William of Poitiers recorded that the Anglo-Saxons were so tightly packed together that ‘the dead could scarcely fall and the wounded could not remove themselves from the action’. William is said to have had three horses killed beneath him.
The Death of King Harold
With the autumn daylight fading, the Normans made one final effort to take the ridge. By that time, Harold’s two brothers and other English commanders were almost certainly dead.
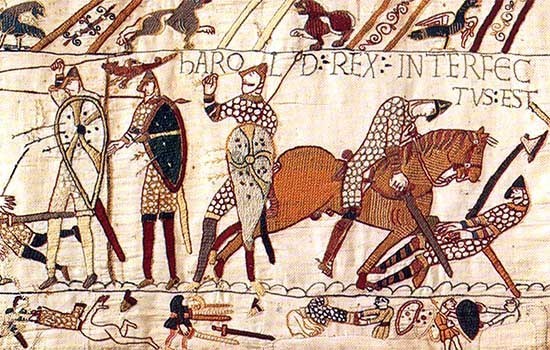
Then came the decisive moment: during the final assault, Harold himself was killed. There are differing accounts of how he died. One describes how an arrow struck him in the right eye, an event possibly depicted in the Bayeux Tapestry. But one of the earliest sources describes Harold being hacked to death at the hands of four Norman knights, in graphic detail:
The first, cleaving his breast through the shield with his point, drenched the earth with a gushing torrent of blood; the second smote off his head below the protection of the helmet and the third pierced the inwards of his belly with his lance; the fourth hewed off his thigh and bore away the severed limb.
By the early 12th century these two accounts had been conflated.
The Battle Ends
The Normans now began a last fierce assault. Leaderless, and lacking hope, the English forces finally gave way and fled. William of Poitiers described the scene:
the Normans, though strangers to the district, pursued them relentlessly, slashing their guilty backs and putting the last touches to the victory. Even the hooves of the horses inflicted punishment on the dead as they galloped over their bodies.
At a time when such contests were frequently decided within an hour, victory at Hastings was not certain until dusk, some nine hours after the fighting began – an indication of just how evenly matched and led the two armies were.
Aftermath
Of course, the Battle of Hastings was only the start of a massive upheaval. After his victory, William marched on London, and he was crowned King of England on Christmas day 1066. A generation later, the Normans had fundamentally transformed the country they had conquered – from how it was organised and governed to its language, laws and customs, and perhaps most visibly today, its architecture. Soon after the Conquest a wave of castle building began across England, in order to secure the Normans’ hold on power.
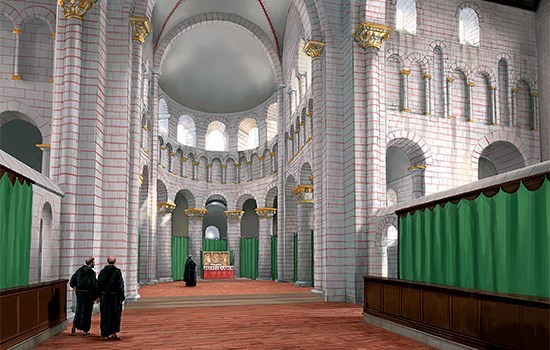
The end of the battle also marks the beginning of the history of Battle Abbey. In about 1071, the king himself founded the abbey on the site of the battle, to atone for the carnage of the Conquest. According to an early tradition, its high altar was placed, on William’s orders, ‘on the very spot’ where Harold’s body had been found.
Find out more
-

1066 and the Norman Conquest
Find out much more about the events of 1066 and the impact of the Conquest, and discover spectacular Norman places to visit across England.
-
Where did the Battle of Hastings Happen?
Was Battle Abbey built ‘on the very spot’ where King Harold fell, or was the Battle of Hastings actually fought elsewhere? Discover the latest thinking about the battlefield’s location.
-
Atoning for the Bloodshed
Battle Abbey was a memorial to William’s great victory – but it was also an act of penance. Find out why this great abbey was founded.
-
The Weapons of 1066
From the simple and affordable club to fine steel-bladed swords, we take a closer look at the weapons used by the Normans and Saxons at Hastings.
-
Battle Abbey's History
Read an in-depth history of the abbey founded by William the Conqueror after the Battle of Hastings, from its foundation to its suppression and after.
-
Buy the Guidebook
This guide includes a tour of the battlefield and the imposing abbey buildings, as well as a history of the site, illustrated with reconstruction drawings, plans and historical images.
