An interview with the butler at Brodsworth Hall
Take a look around the beautiful Brodsworth Hall and Gardens in South Yorkshire and watch as young Members interview the butler, Mr Chuck. Find out who owns the house and what life is like as a butler, then make your own mini model of the house!
Video: meet the butler at Brodsworth Hall
Step back in time and meet the butler at Brodsworth Hall, Mr Chuck. Join him for a tour of the house to learn more about what a butler is and what life is like at Brodsworth Hall
Who owns this house?
This house is owned by Mr Charles Sabine Augustus Thellusson. He inherited the place in 1859 but he had the original hall knocked down and had this magnificent building built in its place. The house was designed by Mr Philip Wilkinson, an architect from London. There are more than 50 rooms, including at least 15 bedrooms for the family and their guests.
What is a butler and what does one do?
It’s my job to attend to Mr Thellusson and his family’s every need. That can include answering the door to guests, delivering messages, and making certain that the larder and the wine cellar are all fully stocked. At every meal, I supervise service. Maintaining Brodsworth Hall is a matter of personal pride for every member of the household, from the footman right up to the housekeeper and myself. In truth, I don’t think a butler’s work is ever done.
Where do you live?
The butler’s pantry is perfectly placed for me to do my job. It’s close to the servants’ quarters, the wine cellar and the front door, so I can answer the bell should visitors come calling. My bedroom is also in the servants’ wing, so I can answer the family’s needs at a moment’s notice. The perks of having a larger bedroom and a private pantry also come with extra responsibilities. That means that I have to look after the Thellusson family and answer Mr Thellusson’s needs at any time of day… or night.
Who are you in charge of?
The majority of the household staff fall under the command of either myself or of the housekeeper, Mrs Hay. There is the cook, the kitchen maid, the two nurses for Mr and Mrs Thellusson’s children, and all of the gardeners and ground staff. I have particular responsibility for the three footmen. I tell them that I expect the very highest standards of service and quality for the Thellussons. Overseeing all of these staff, along with my own duties, and making certain that the Thellussons’ every need is met, I’m kept very, very busy.
Family Home
Brodsworth Hall belonged to the Thellusson family. Peter Thellusson, who was a wealthy businessman, bought a Georgian manor in 1791. When his grandson, Charles Sabine Thellusson, inherited the house in 1858, he decided to replace the old manor with a much bigger new house – Brodsworth Hall. He also made changes to the land around the house, with woods for shooting and new farm buildings.
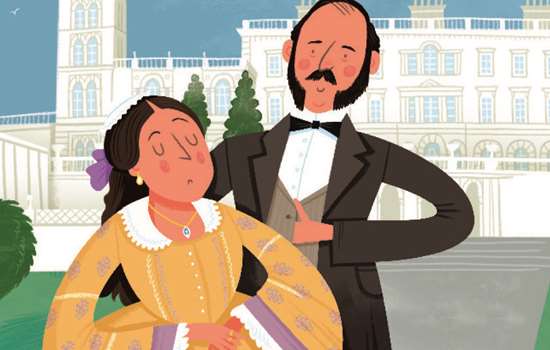
But the Thellusson family began to lose their fortune, and they couldn’t afford to maintain the hall properly. Charles’s grandson, also called Charles, inherited it in 1931. He lived here with his wife Sylvia and their daughter Pamela (pictured). Charles died in 1952 but Sylvia carried on living in the hall until 1988. After this, Pamela gave the house and gardens to English Heritage. The house today still looks a lot like it did when Sylvia was living here – although fortunately the leaking roofs have now been fixed!
Make your own model of Brodsworth Hall
You will need:
Now you can make your very own model of Brodsworth Hall. Ask an adult to download our template and print it out for you, then follow the instructions below to build a mini version of this huge Victorian home.
Once you’ve completed it, put your model on display and imagine yourself looking after the huge house like the butler Mr Chuck!
- Print outs of the model house templates
- Scissors
- Glue or double-sided sticky tape
-

Step 1
Download your templates and print them out. Cut them out using a pair of scissors (or ask a grown-up to help). To make the pieces stronger, print or stick them on to thin card before cutting them out.
-

Step 2
Start by making the north building. First, join the four north building walls (A, B, C and D) together.
-

Step 3
Fold the tops of the walls down to create a horizontal platform. This is where the roof will sit.
-

Step 4
Glue the north roof base (E) on to the platform created in step 3. You’ll notice your model becomes a lot stronger once this is added.
-

Step 5
Now add a roof on to the model. North roof 1 (F) folds together to create a double roof. Put glue on the tabs, then fold the sides together to create the shape. Stick the roof onto the white part of the flat roof.
-

Step 6
Two more pieces are needed to complete the north building. Fold together north roof 2 (G) and north roof 3 (H) and stick together using the tabs. Glue these onto the flat roof on the tiled area as in the picture.
Put your completed north building to one side and move on to the next step.
-

Step 7
Next, make the main part of Brodsworth Hall. Start by sticking the walls together to make one very long wall. Some of the tabs will overlap – don’t worry! Once the walls are folded, it will fit together perfectly. Glue them together in this order: J, K, M, N, O, P, Q, R, S.
-

Step 8
Fold along the dotted lines, following the shape of the building outline that you can see in the shape of the south building roof base (T). Fold the tabs down at the top of the walls to create a ledge for the roof base to sit on.
-

Step 9
Stick the line of walls together to form the south building, then glue the south building roof base (T) on to the platform of tabs you created in step 8.
-

Step 10
Carefully cut out the gaps between the pillars on the porch (U). A small pair of nail scissors are ideal for getting into these small gaps – or ask a grown-up to help you. Fold the porch and stick the small porch roof (V) onto the top to hold it together. Glue it to the east side of the main building where you can see the door and columns, using the two small rectangular tabs.
-

Step 11
There’s a roof that runs around the edge of the building and it’s made up of three pieces, which are labelled south roof 1a, 1b and 1c. Stick these together in the order shown in the picture.
-

Step 12
Fold along the dotted lines and stick the ends together. Put some glue on the back of the roof (the white side) and stick it to the side, over the areas marked SR1a, SR1b and SR1c on the flat south roof base (T).
-

Step 13
The largest roof on the top of the building is made from two pieces, south roof 2 and south roof 3a. Fold along the dotted lines and glue them together using the tabs. Once they are created, you’ll see how the two roof pieces fit together. Use glue to join them into the main roof.
Put some glue on the white bottom side of this L-shaped roof and stick it on to the roof base (T), on the areas marked SR2 and SR3a.
-

Step 14
Fold along the dotted lines on south roof 4, and glue it together. This small roof tucks into the wall above the porch, on the area marked SR4. Add some glue on the base and stick it onto your model.
-

Step 15
Fold along the dotted lines on south roof 5 (skylight) and south roof 6 (door). Use the tabs stick them together then add glue or double-sided tape to the bottom of these pieces and stick them to the areas marked SR5 and SR6 on the south roof base (T).
-

Step 16
To complete the roof, fold the two remaining roofs (south roof 3b and south roof 3c) and use the tabs to stick them onto the areas marked SR3b and SR3c on the south roof base (T).
-

Step 17
Glue the bell tower (W) onto the end of the north building.
Glue two of the four roof details (X) onto the front, and one onto each side, of the south building, as shown in the picture.
-

Step 18
Add some glue to the white part of the smaller north building, then slot it into the larger south building and stick them together to complete your model of Brodsworth Hall!